
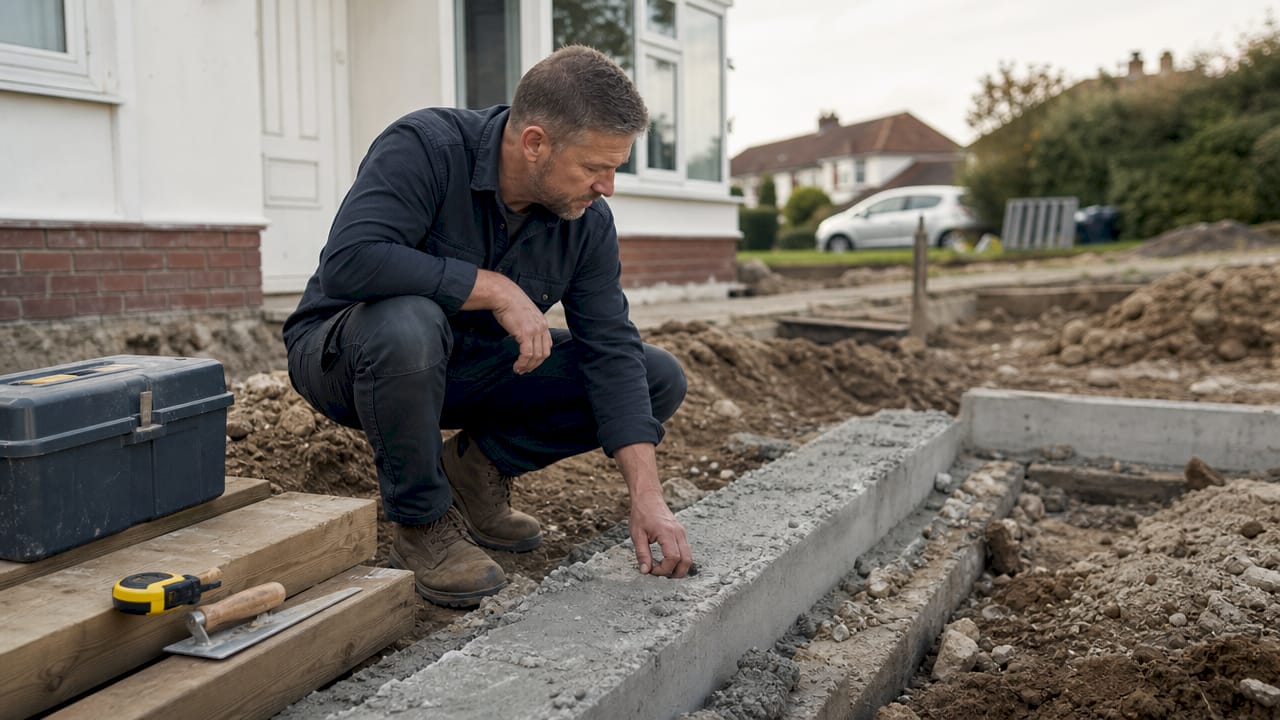
A porch extension is a load-bearing structural addition that extends your home’s footprint by creating a covered outdoor space tied directly into your existing house frame. Unlike a simple canopy or lean-to shelter, a properly built porch extension carries its own vertical loads independently while connecting to primary structural framing members for long-term stability. Build schedules typically run 3–8 weeks depending on complexity, weather, and site conditions. Understanding how porch extensions are built from the ground up gives you the knowledge to plan confidently, whether you intend to manage the project yourself or appoint a professional builder.
What are the essential foundations for a porch extension?
The foundation is the single most critical element of any porch extension construction. Get it wrong and every component above it will shift, crack, or fail within a few seasons. The ground beneath your porch must be excavated and prepared before any concrete is poured.
Building codes require footings to be dug below the local frost line, which in many UK and Northern European climates means a minimum depth of 36–48 inches. Frost heave pushes soil upward during freeze-thaw cycles. A footing set above the frost line will move with the ground, causing the entire structure to rack and settle unevenly.
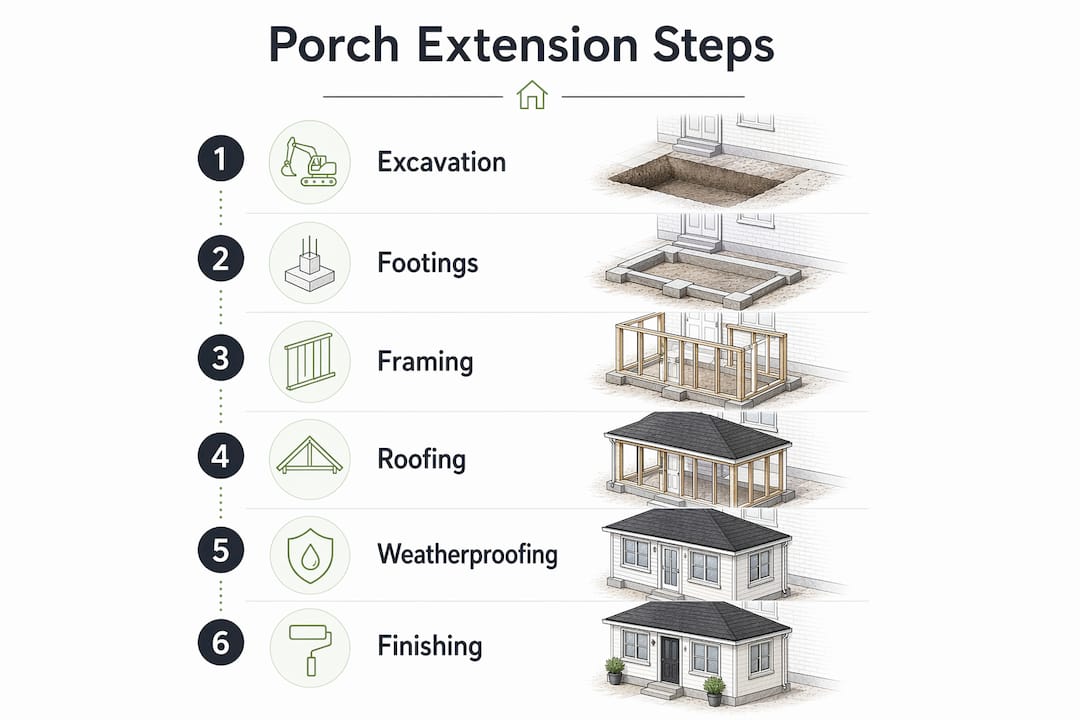
Once excavated, the footing holes are filled with concrete and allowed to cure properly. Concrete footings require at least 48 hours of curing before any load is applied. Rushing this stage is one of the most common DIY mistakes. The concrete must reach sufficient strength before posts are anchored and weight is transferred downward.
Key groundwork requirements for a sound porch foundation:
- Excavation depth: Dig below the frost line, typically 36–48 inches, to prevent seasonal movement.
- Concrete mix: Use a structural-grade mix appropriate for outdoor footings exposed to moisture.
- Post anchors: Fit high-quality post-to-concrete connectors that hold posts clear of the slab surface to prevent base rot.
- Drainage: Grade the surrounding ground away from the house at a minimum fall to direct surface water clear of the footings.
- Inspection: Have footings inspected before backfilling if your local authority requires it.
Pro Tip: Never set timber posts directly into concrete. The post-to-concrete interface traps moisture and accelerates rot within a few years. Use a purpose-made post base connector that holds the timber 50mm or more above the slab.
Drainage is often overlooked at the foundation stage. Water pooling around footings saturates the soil, reduces bearing capacity, and accelerates concrete degradation. A simple perimeter drain or gravel backfill around each footing resolves this before it becomes a structural problem.
How is framing constructed to ensure structural integrity?
Framing is where a porch extension takes its shape and gains its structural character. Porch structural systems must carry vertical loads independently and tie directly into existing home framing members for continuity and strength. This dual requirement, self-sufficiency plus integration, is what separates a well-built porch from a structure that will fail under load or in high winds.
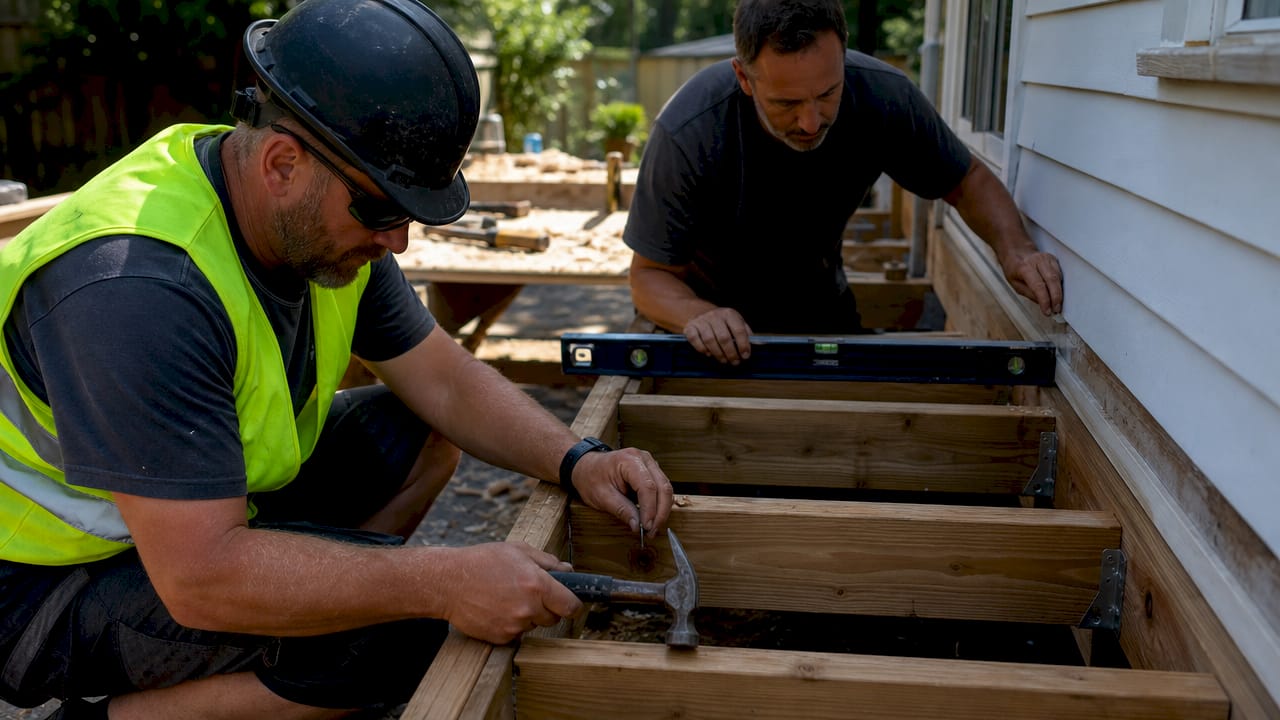
Careful load calculations before framing ensure appropriate beam and post sizes, which is critical for both safety and long-term durability. A porch designed only for foot traffic needs lighter framing than one supporting a tiled roof with snow load potential. Skipping this calculation stage is how undersized beams end up deflecting visibly within a year.
The framing sequence follows a logical order:
- Install the ledger board. The ledger attaches directly to the house’s rim joist or band joist, creating the primary connection point between the new porch and the existing structure. Use structural lag screws at regular centres and apply flashing above the ledger immediately to prevent water ingress behind it.
- Set the posts. Place posts on their cured concrete footings using the post base connectors installed earlier. Check each post for plumb on two faces before securing.
- Install the beam. The primary beam spans between posts and carries the outer edge of the porch floor and roof loads. Size the beam according to span and load calculations, not guesswork.
- Add the joists. Floor joists run from the ledger board to the beam, creating the structural deck platform. Space them at 400mm or 600mm centres depending on the decking material above.
- Brace temporarily. Fit diagonal bracing before releasing any temporary supports. The frame must be square before permanent connections are made.
- Check and square. Measure diagonals across the frame. Equal diagonal measurements confirm a square structure. A frame that is out of square will cause problems at every subsequent stage.
Pro Tip: Use a string line and spirit level across the top of the ledger board and beam before installing joists. Any twist or bow in the primary members will telegraph through to the finished floor surface.
The connection between the ledger board and the house is the structural heart of the entire build. Use joist hangers rated for the load, and never rely on nails alone for this joint. Stainless steel or hot-dipped galvanised fixings are the correct choice for any outdoor structural connection.
What are best practices for porch roofing and weatherproofing?
The roof is where most porch extensions succeed or fail over time. Improper water management at the junction between the porch roof and the home is the most common cause of failures and water damage. A roof that sheds water efficiently and seals perfectly at the house connection will last decades. One that does not will cause rot, damp, and structural damage within a few years.
Two roof forms dominate porch extension construction:
- Lean-to (mono-pitch) roof: A single slope running away from the house wall. Simpler to build and integrate, it suits most single-storey porch additions. The high side connects directly to the house wall or soffit line.
- Gable roof: A symmetrical pitched roof with a ridge at the centre. More complex to frame and flash, but it matches traditional house rooflines more closely and provides better headroom.
Porch roof pitches typically range from 3:12 to 6:12, meaning the roof rises 3 to 6 inches for every 12 inches of horizontal run. A shallower pitch sheds water more slowly and demands a more watertight covering material. A steeper pitch handles rainfall more effectively and suits traditional clay or concrete tiles.
| Roof type | Pitch range | Best covering material | Key advantage |
|---|---|---|---|
| Lean-to | 3:12 to 5:12 | Metal panels, EPDM rubber, or felt | Simple integration with house wall |
| Gable | 4:12 to 6:12 | Concrete tiles, slate, or metal | Matches existing roofline aesthetics |
Water management at the house connection requires layered detailing:
- Continuous step flashing runs behind the wall cladding and over each rafter tail at the junction.
- Underlayment covers the full roof deck before any surface material is applied.
- A saddle or cricket diverts water around any chimney or projection the porch roof meets.
- Gutters and downpipes carry water from the roof edge to a drain, preventing it from pooling at the foundation.
Building permits and inspections are often required for porch extensions depending on size and location. Structural drawings and material specifications should be documented before work begins. This protects you legally and ensures the build meets current standards.
What finishing touches and safety requirements complete the build?
Finishing a porch extension involves more than aesthetics. Safety compliance, material protection, and weatherproofing details at this stage determine how long the structure performs without maintenance.
Decking and railing installation are the two most visible finishing elements:
- Decking boards: Hardwood, composite, or pressure-treated softwood are the standard choices. Fix boards with a 3–5mm gap between them to allow drainage and natural movement.
- Safety railings: Porches where the floor height exceeds 30 inches above adjacent ground require safety railings. This is a building code requirement, not a design preference. Balusters must be spaced to prevent a 100mm sphere from passing through.
- Post wrapping: Structural posts are often wrapped in a finish timber or PVC sleeve for appearance and protection. The wrap must not trap moisture against the structural post beneath.
- Fascias and soffits: Fit these to close the roof eaves neatly and prevent birds and insects from nesting in the roof void.
- Paintwork and sealants: Apply an exterior-grade primer and topcoat to all exposed timber. Seal any gap where the porch meets the house wall with a flexible, paintable exterior sealant.
Compliance with relevant building regulations is non-negotiable. Your local authority building control team can confirm what applies to your specific project. A porch extension that has been built without the required approvals can cause serious problems when you come to sell the property.
Key takeaways
A successful porch extension depends on sound foundations, correctly sized framing tied into the existing house structure, and watertight roofing details at the house connection point.
| Point | Details |
|---|---|
| Foundations below frost line | Excavate to 36–48 inches and cure concrete for at least 48 hours before loading. |
| Structural framing integration | Tie the ledger board directly into the house’s primary framing members using rated fixings. |
| Roof water management | Use continuous flashing, underlayment, and gutters to prevent leaks at the house junction. |
| Safety railing compliance | Install railings on any porch floor more than 30 inches above ground level. |
| Permits and documentation | Obtain required building approvals and keep structural drawings on file before starting work. |
What I have learned from years of porch extension builds
After working on porch extension projects across Liverpool and Merseyside, the pattern of failures is remarkably consistent. The problems rarely start with the visible work. They start with decisions made before a single hole is dug.
The most damaging mistake I see is skipping the load calculation stage. Homeowners and even some builders assume that because a porch looks simple, the framing can be sized by eye. It cannot. A covered porch with a tiled roof carries a meaningful load, and undersized beams will deflect visibly within a season. Do the maths before you order timber.
Water management at the house connection is the second consistent failure point. I have seen beautifully finished porches develop serious damp problems within two years because the flashing detail at the wall junction was inadequate. Layered step flashing, a proper underlayment, and a continuous bead of flexible sealant at every penetration are not optional extras. They are the difference between a porch that lasts 30 years and one that causes a costly repair bill.
Licensed contractors are advised for any porch build that includes a covered roof or house framing integration to mitigate structural risk. That is sound advice. A confident DIY enthusiast can handle decking and railing installation. The structural connections and roofing integration genuinely benefit from professional experience. Knowing where your skills end is not a weakness. It is good project management.
— Will
Porch extensions built to last: how Ajcandsonbuilders can help
Planning a porch extension is one thing. Executing it to a standard that will last decades, pass inspection, and add genuine value to your home is another matter entirely.

Ajcandsonbuilders is a family-run building firm serving Liverpool and Merseyside, with a strong track record in house extensions and structural additions of all scales. From initial groundworks through to finished decking and roofing, our team handles every stage with the care and craftsmanship your home deserves. If you are ready to move from planning to building, visit Ajcandsonbuilders to request a free quote or browse our completed project portfolio for inspiration.
FAQ
How long does a porch extension take to build?
Most porch extension builds take between 3 and 8 weeks from groundworks to completion. Complexity, weather conditions, and the need for inspections all affect the final timeline.
Do I need planning permission for a porch extension in the UK?
Many porch extensions fall within permitted development rights, but size, height, and proximity to boundaries affect eligibility. Always check with your local planning authority before starting work.
How deep do porch footings need to be?
Footings must be excavated below the local frost line, typically 36–48 inches deep, to prevent seasonal frost heave from lifting and cracking the structure.
What is the most common cause of porch extension failure?
Improper water management at the junction between the porch roof and the house wall is the leading cause of structural failure and damp damage in porch extensions.
Can I build a porch extension myself?
Basic decking and railing work is within reach for a skilled DIY enthusiast. However, structural framing connections and covered roof integration carry significant risk and are best handled by a licensed contractor.